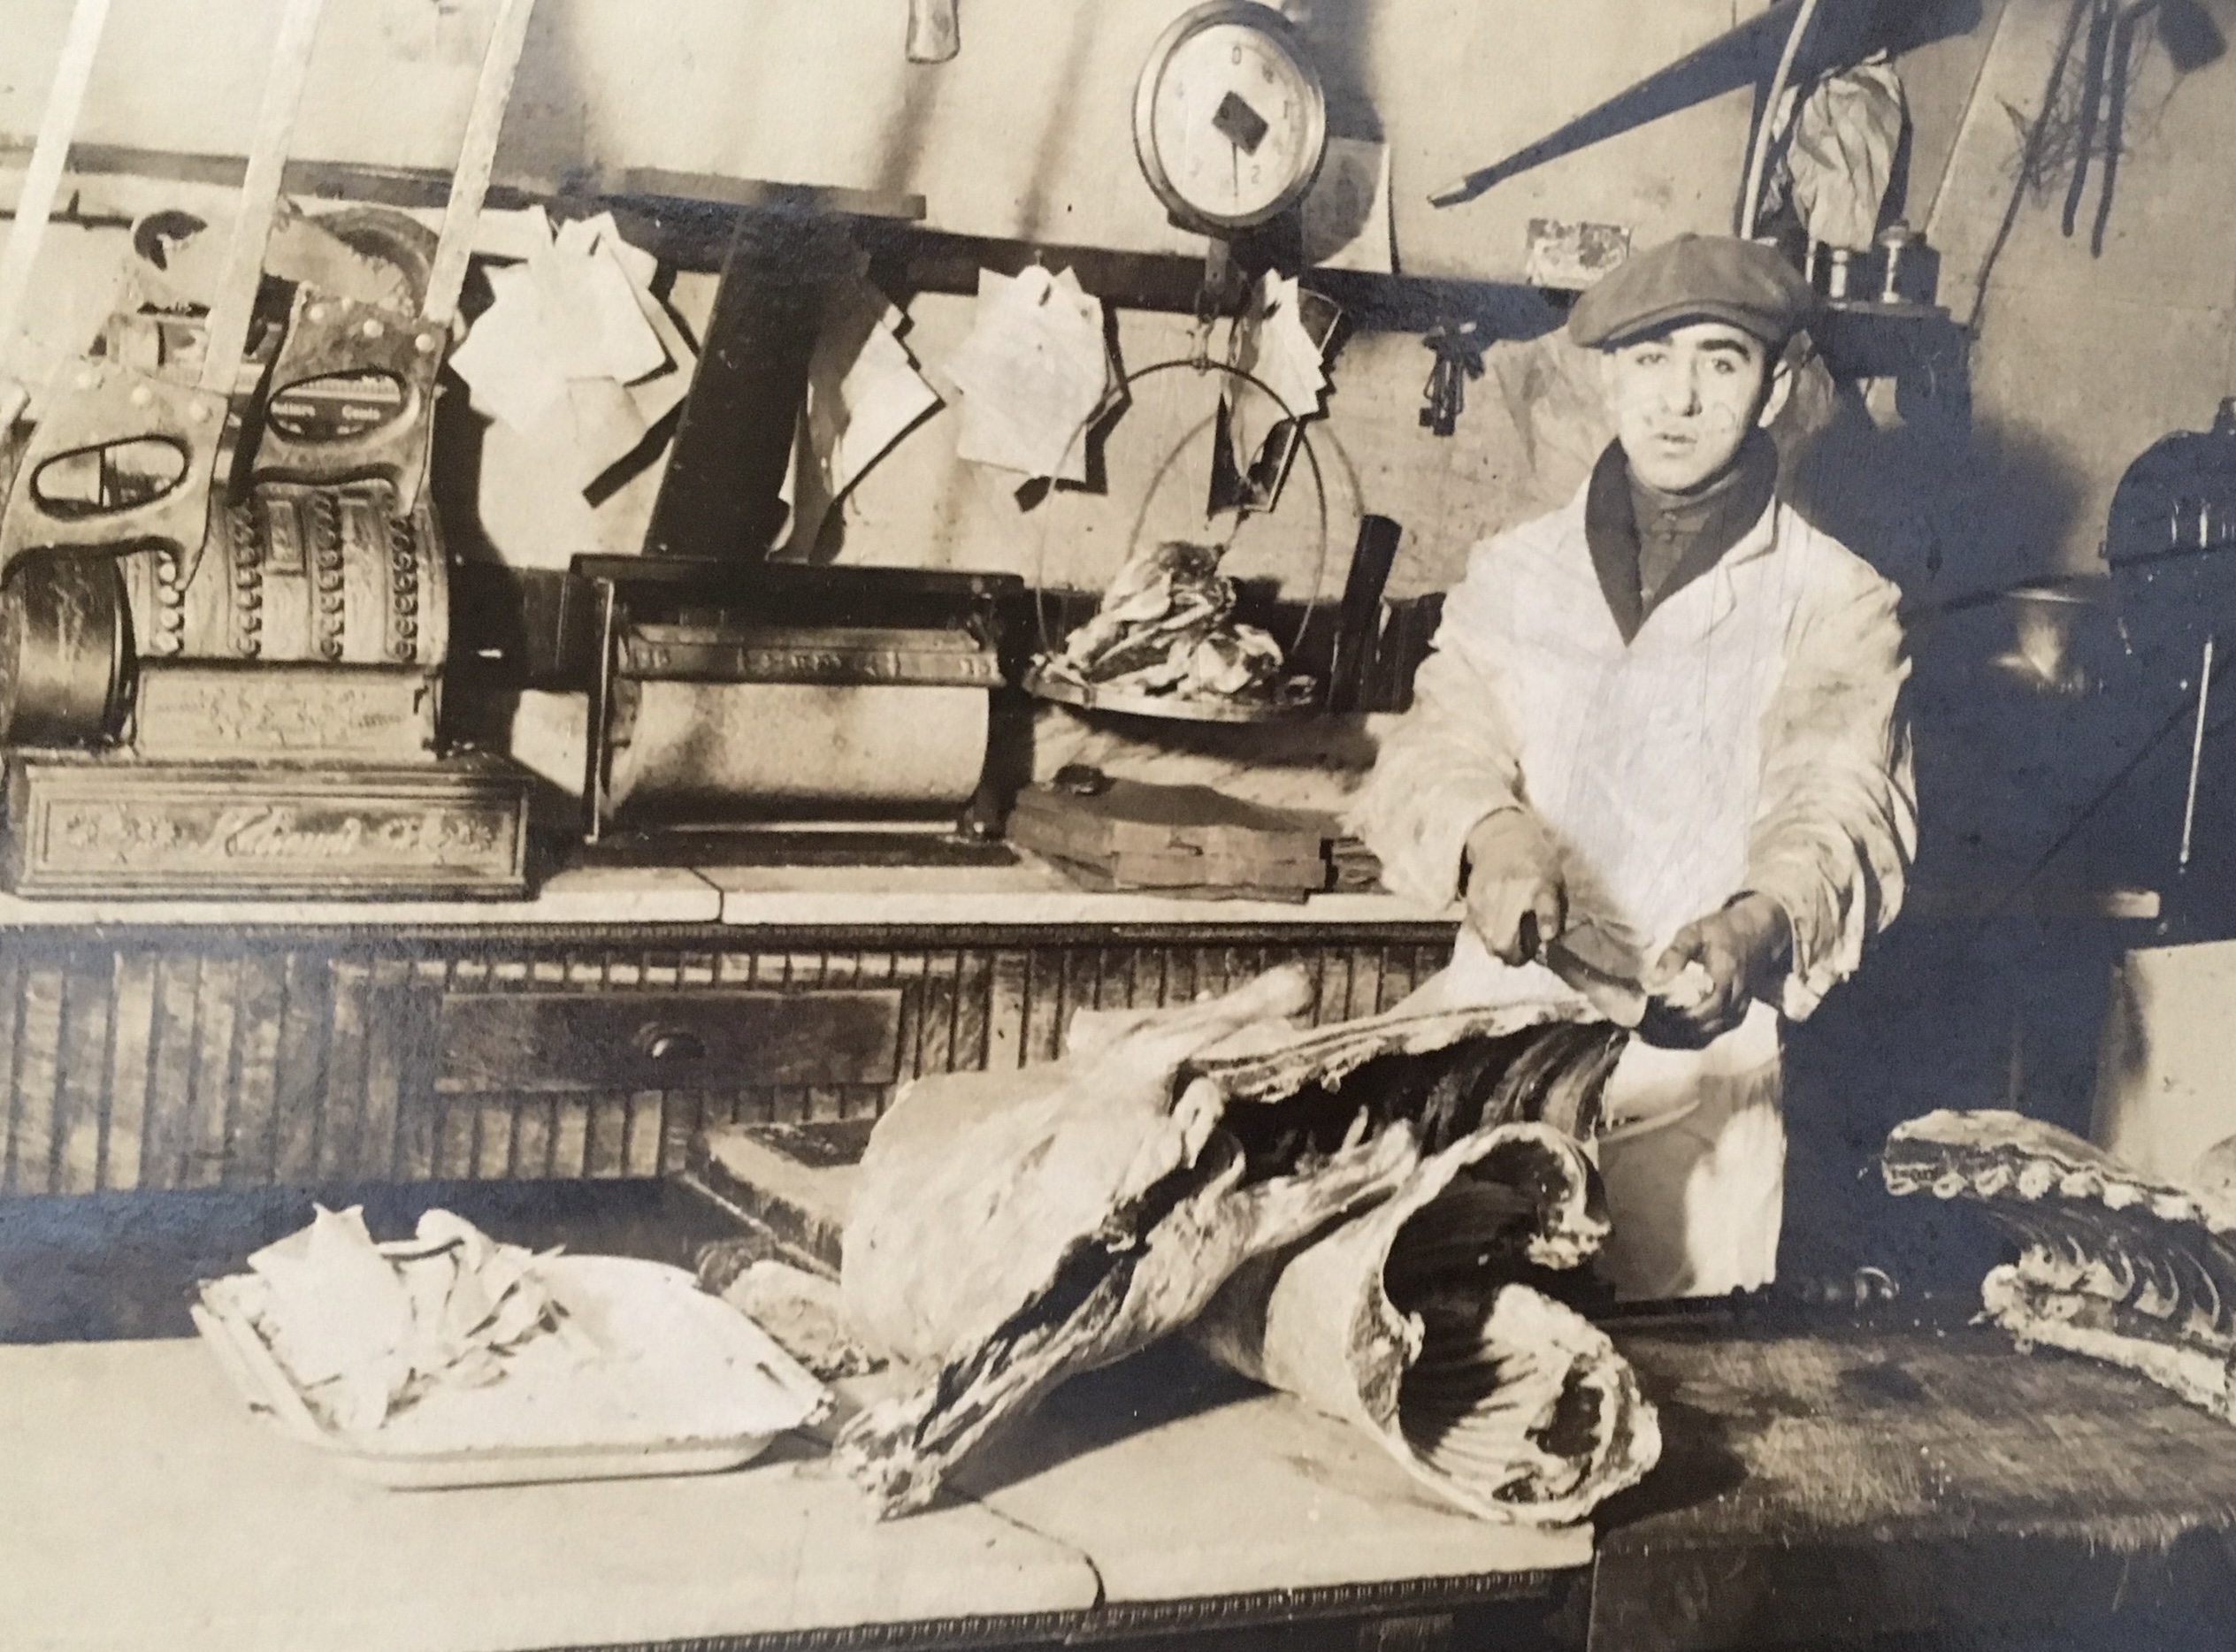
My grandfather came to this country alone, in his late teens. He landed on Ellis Island and settled on Mulberry Street in the Four Corners section of lower Manhattan. He heard the streets were paved in gold in America only to find out for Italians of that time, the streets were brutal and dirty. Italians were treated like animals and many didn’t survive their ordeal. Those that did, survived by doing back breaking, dangerous work that no one else would do, and perseverance. He dug the tunnels under Manhattan that became the IRT Transit line. The underground subway line opened in 1904.

He saved enough money, met my grandmother, who was living on Elizabeth Street with her family, and got married. He eventually opened up a butcher shop and made a better life for his wife and her family. In 1920 they all moved to 77 Street and 15th Avenue in the beautiful suburbs of Bensonhurst Brooklyn.
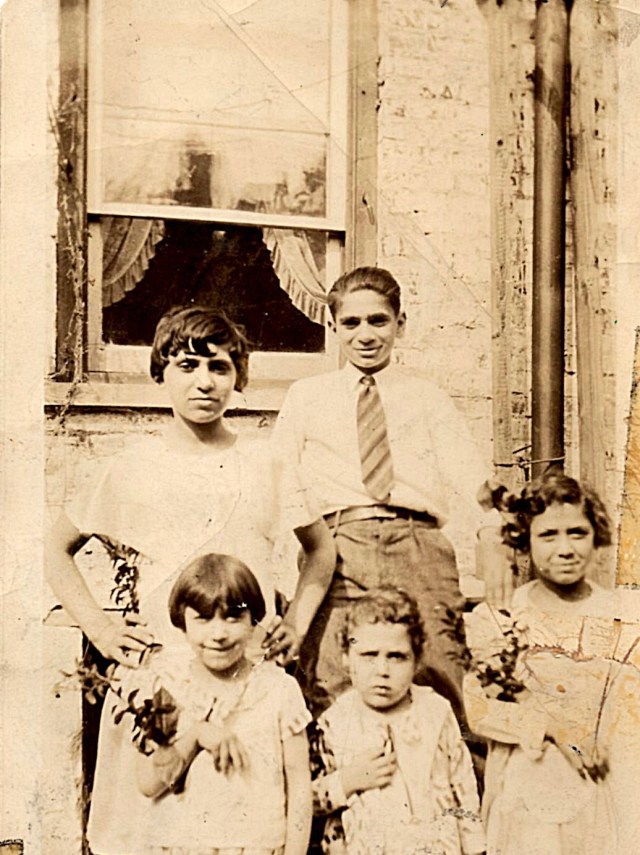
My mother (top left) and uncle (top right) were around 9 years old at the time. They grew up in the same house that I did on 77 Street in Brooklyn.

This photo was taken of my grandparents sometime around 1960 in our living room.
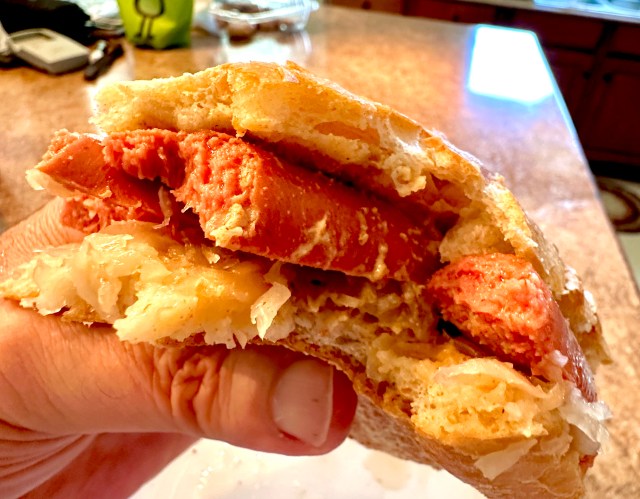
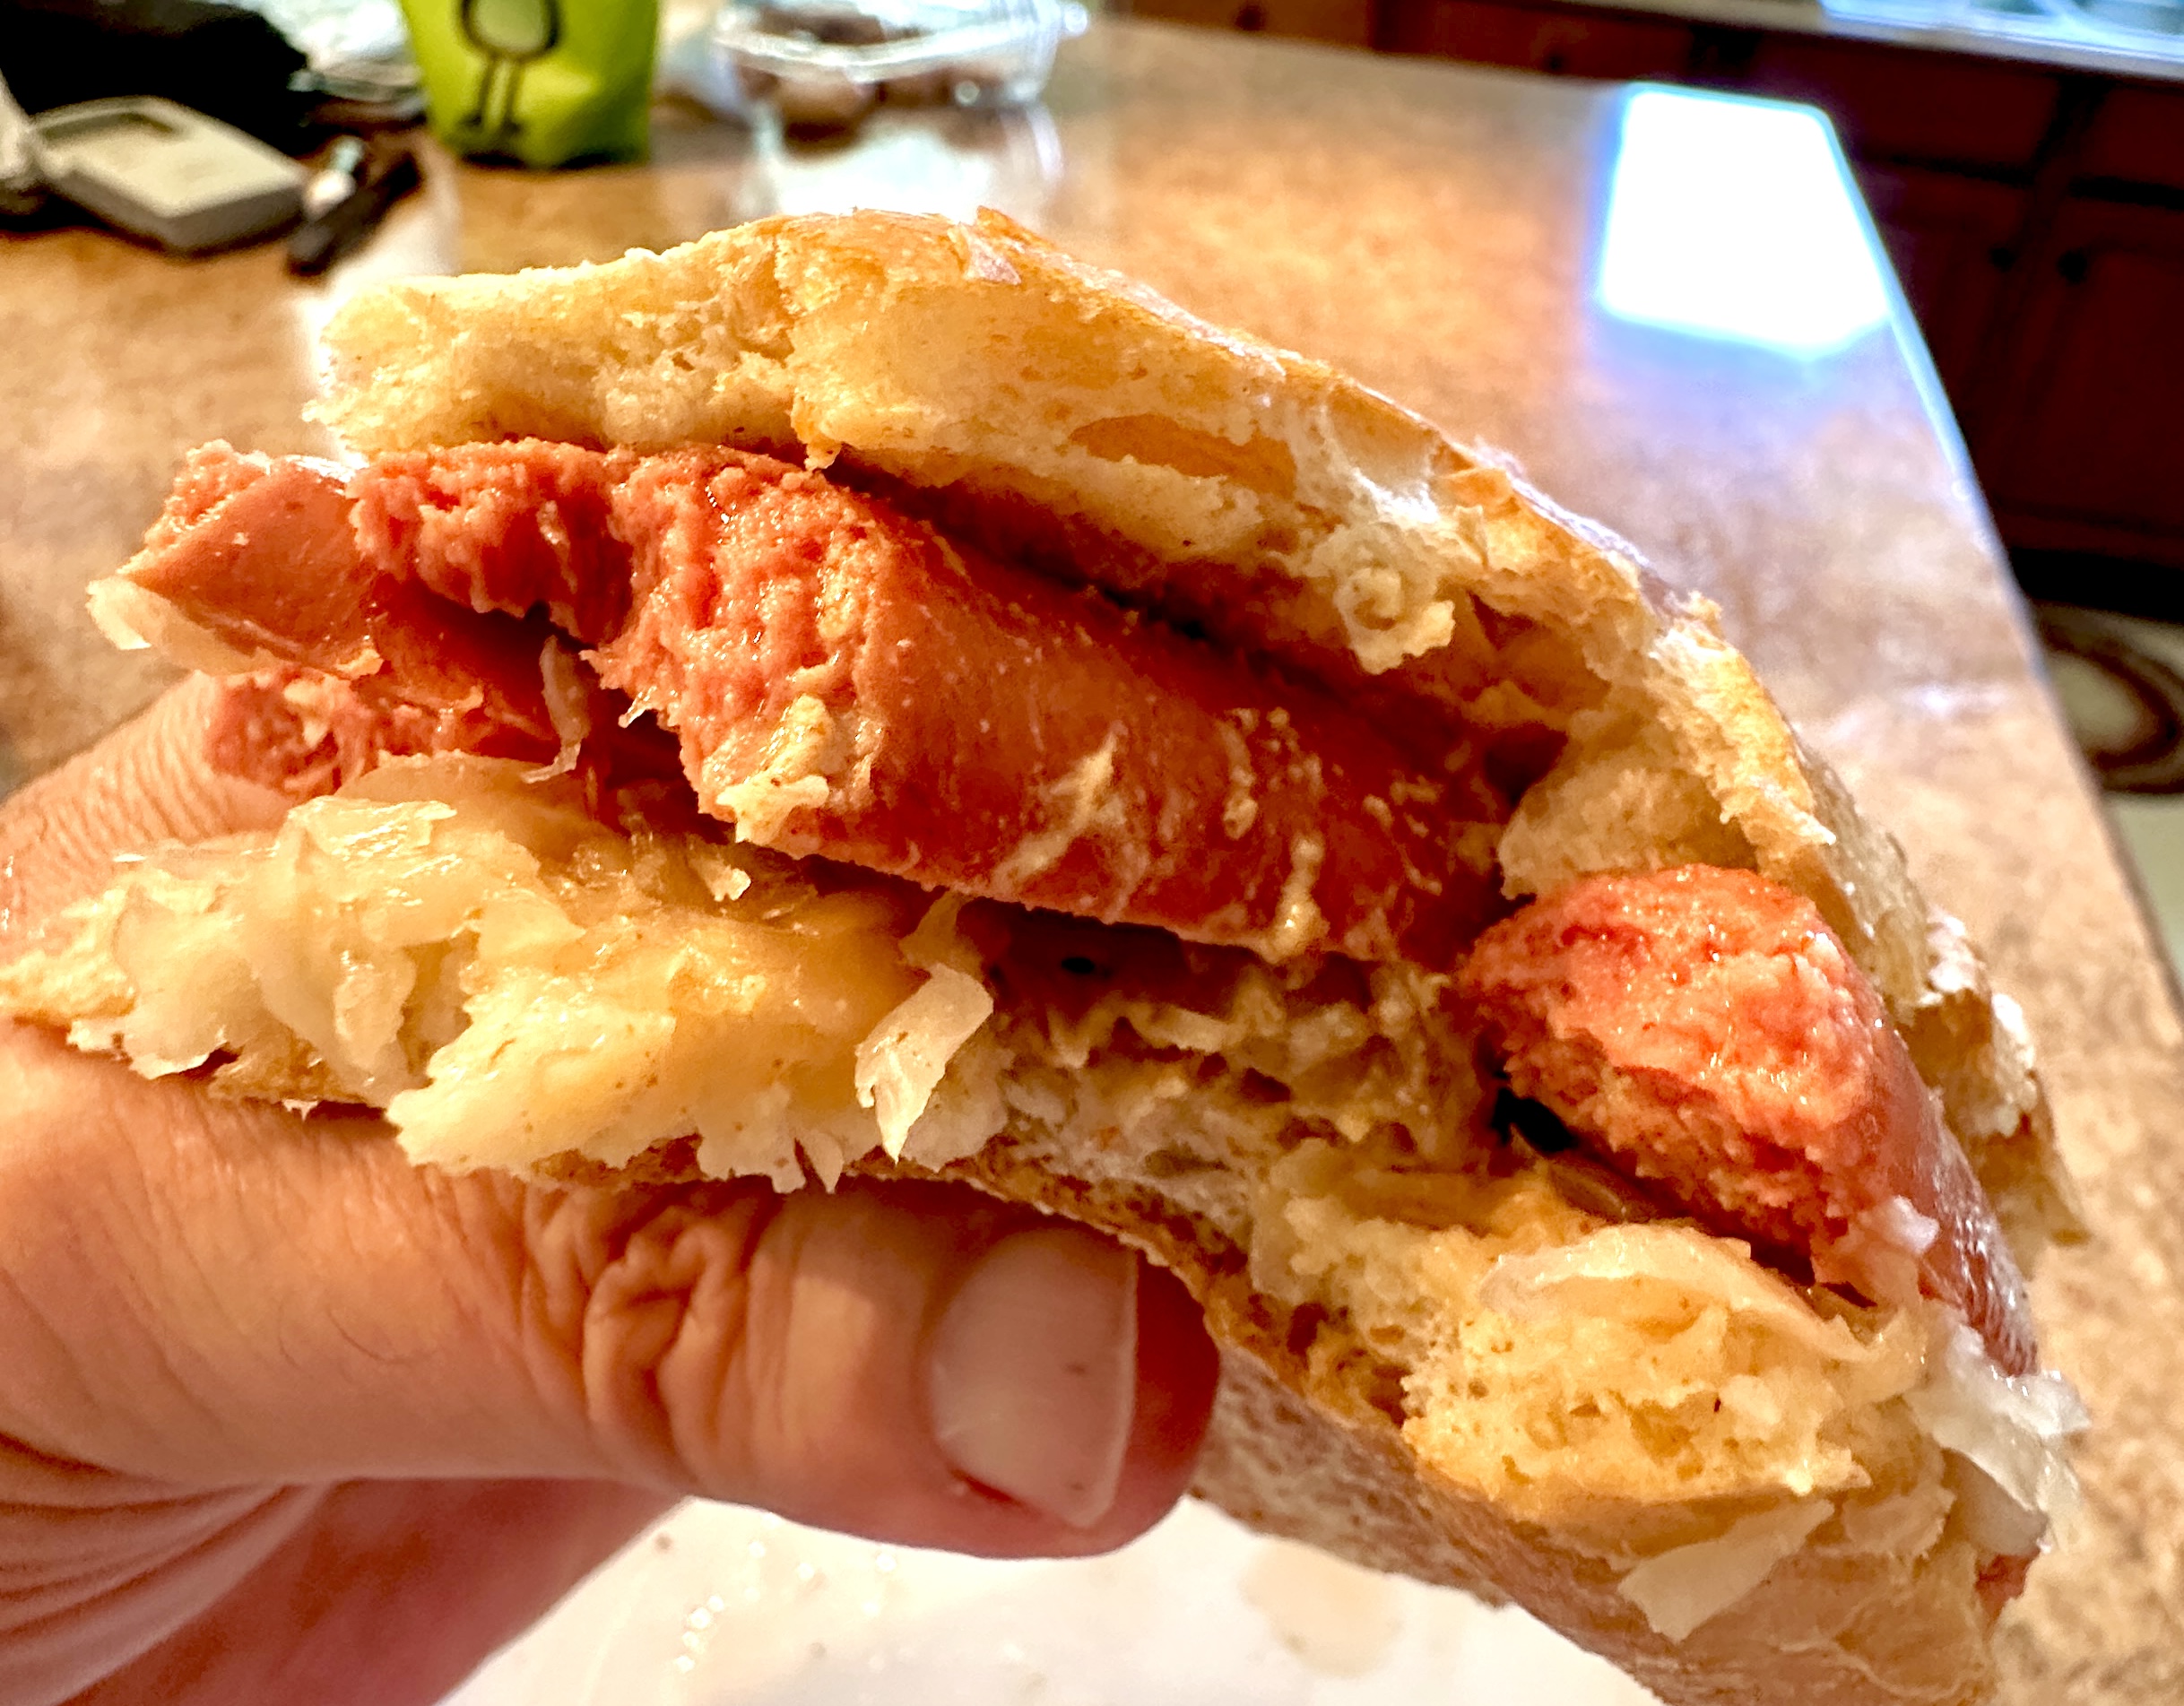
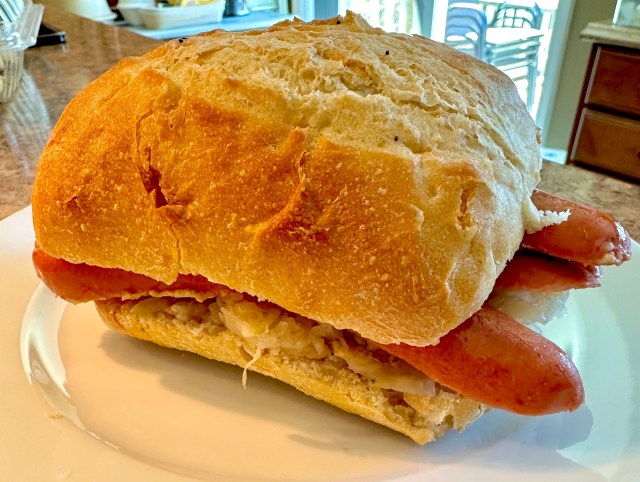
I call this Grandpa’s Italian Hot Dog because this is the way he used to eat them at home. Italian Hot Dogs are very common today. In New Jersey two establishments serve an Italian hot dog, Jimmy Buffs in West Orange and Dickie Dee’s in Newark. Both of them have a version with potatoes, peppers and onions on a pizza roll. My grandfather lived among the place where the American hot dog was invented. The original and most famous hot dogs in the world, Nathans’s of Coney Island. Here in New York everyone ate their hot dogs with mustard and sauerkraut. That was the original way and that is the way I grew up eating them. Didn’t matter if it was Nathan’s of Coney Island or the many Kosher deli’s that served them around Brooklyn and The City, Hot dogs wee served with mustard and kraut.
When I was a young boy I recall my grandfather occasionally having a quick hot dog sandwich for lunch. Nothing special, just a hot dog with mustard and kraut. But this was my grandfather’s version. I guess if you had a hot dog away from home you were always served it on a hot dog roll. But eating hot dogs at home, my grandfather would use a fresh Italian roll he bought at a neighborhood bakery called Termini’s. I remember watching him make his sandwich and enjoying it. He made one for me, and from that point on, this was Grandpa’s Italian Hot dog. Till this day I still crave it. Like everything else I learned to eat from my grandparents, some of the best dishes were simple and delicious. Maybe enjoying them today just brings back that comfort food moment that only grandparents can offer you. This was one of them.
My grandfather only ate all beef hot dogs. They had to be Kosher. He was in the meat business and knew what went into all the processed foods so he trusted Kosher products over anything else. The roll he used was an Italian sandwich roll that comes close to today’s Ciabatta rolls or Portuguese rolls. Like a small loaf of crispy Italian bread. He would grill the hot dogs and once cooked, split them down the middle so they didn’t roll around the sandwich and layed flat. He coated both sides of the roll with a spicy brown mustard, like Gulden’s brand. Sauerkraut was warmed up in a small pot and layered on the roll with the hot dog and mustard. Simple. Nothing fancy. But having a hot dog on a crispy Italian roll made it a whole other experience. Like I said, I crave it sometimes and have it instead of the usual hot dog bun. It brings me back each time enjoying a hot dog with my grandfather at the kitchen table in Brooklyn. Here’s how it’s done.
- A crispy Italian roll, ciabatta, or Portuguese roll
- 2 all beef hot dogs, Hebrew National or similar
- Guldens mustard
- canned sauerkraut
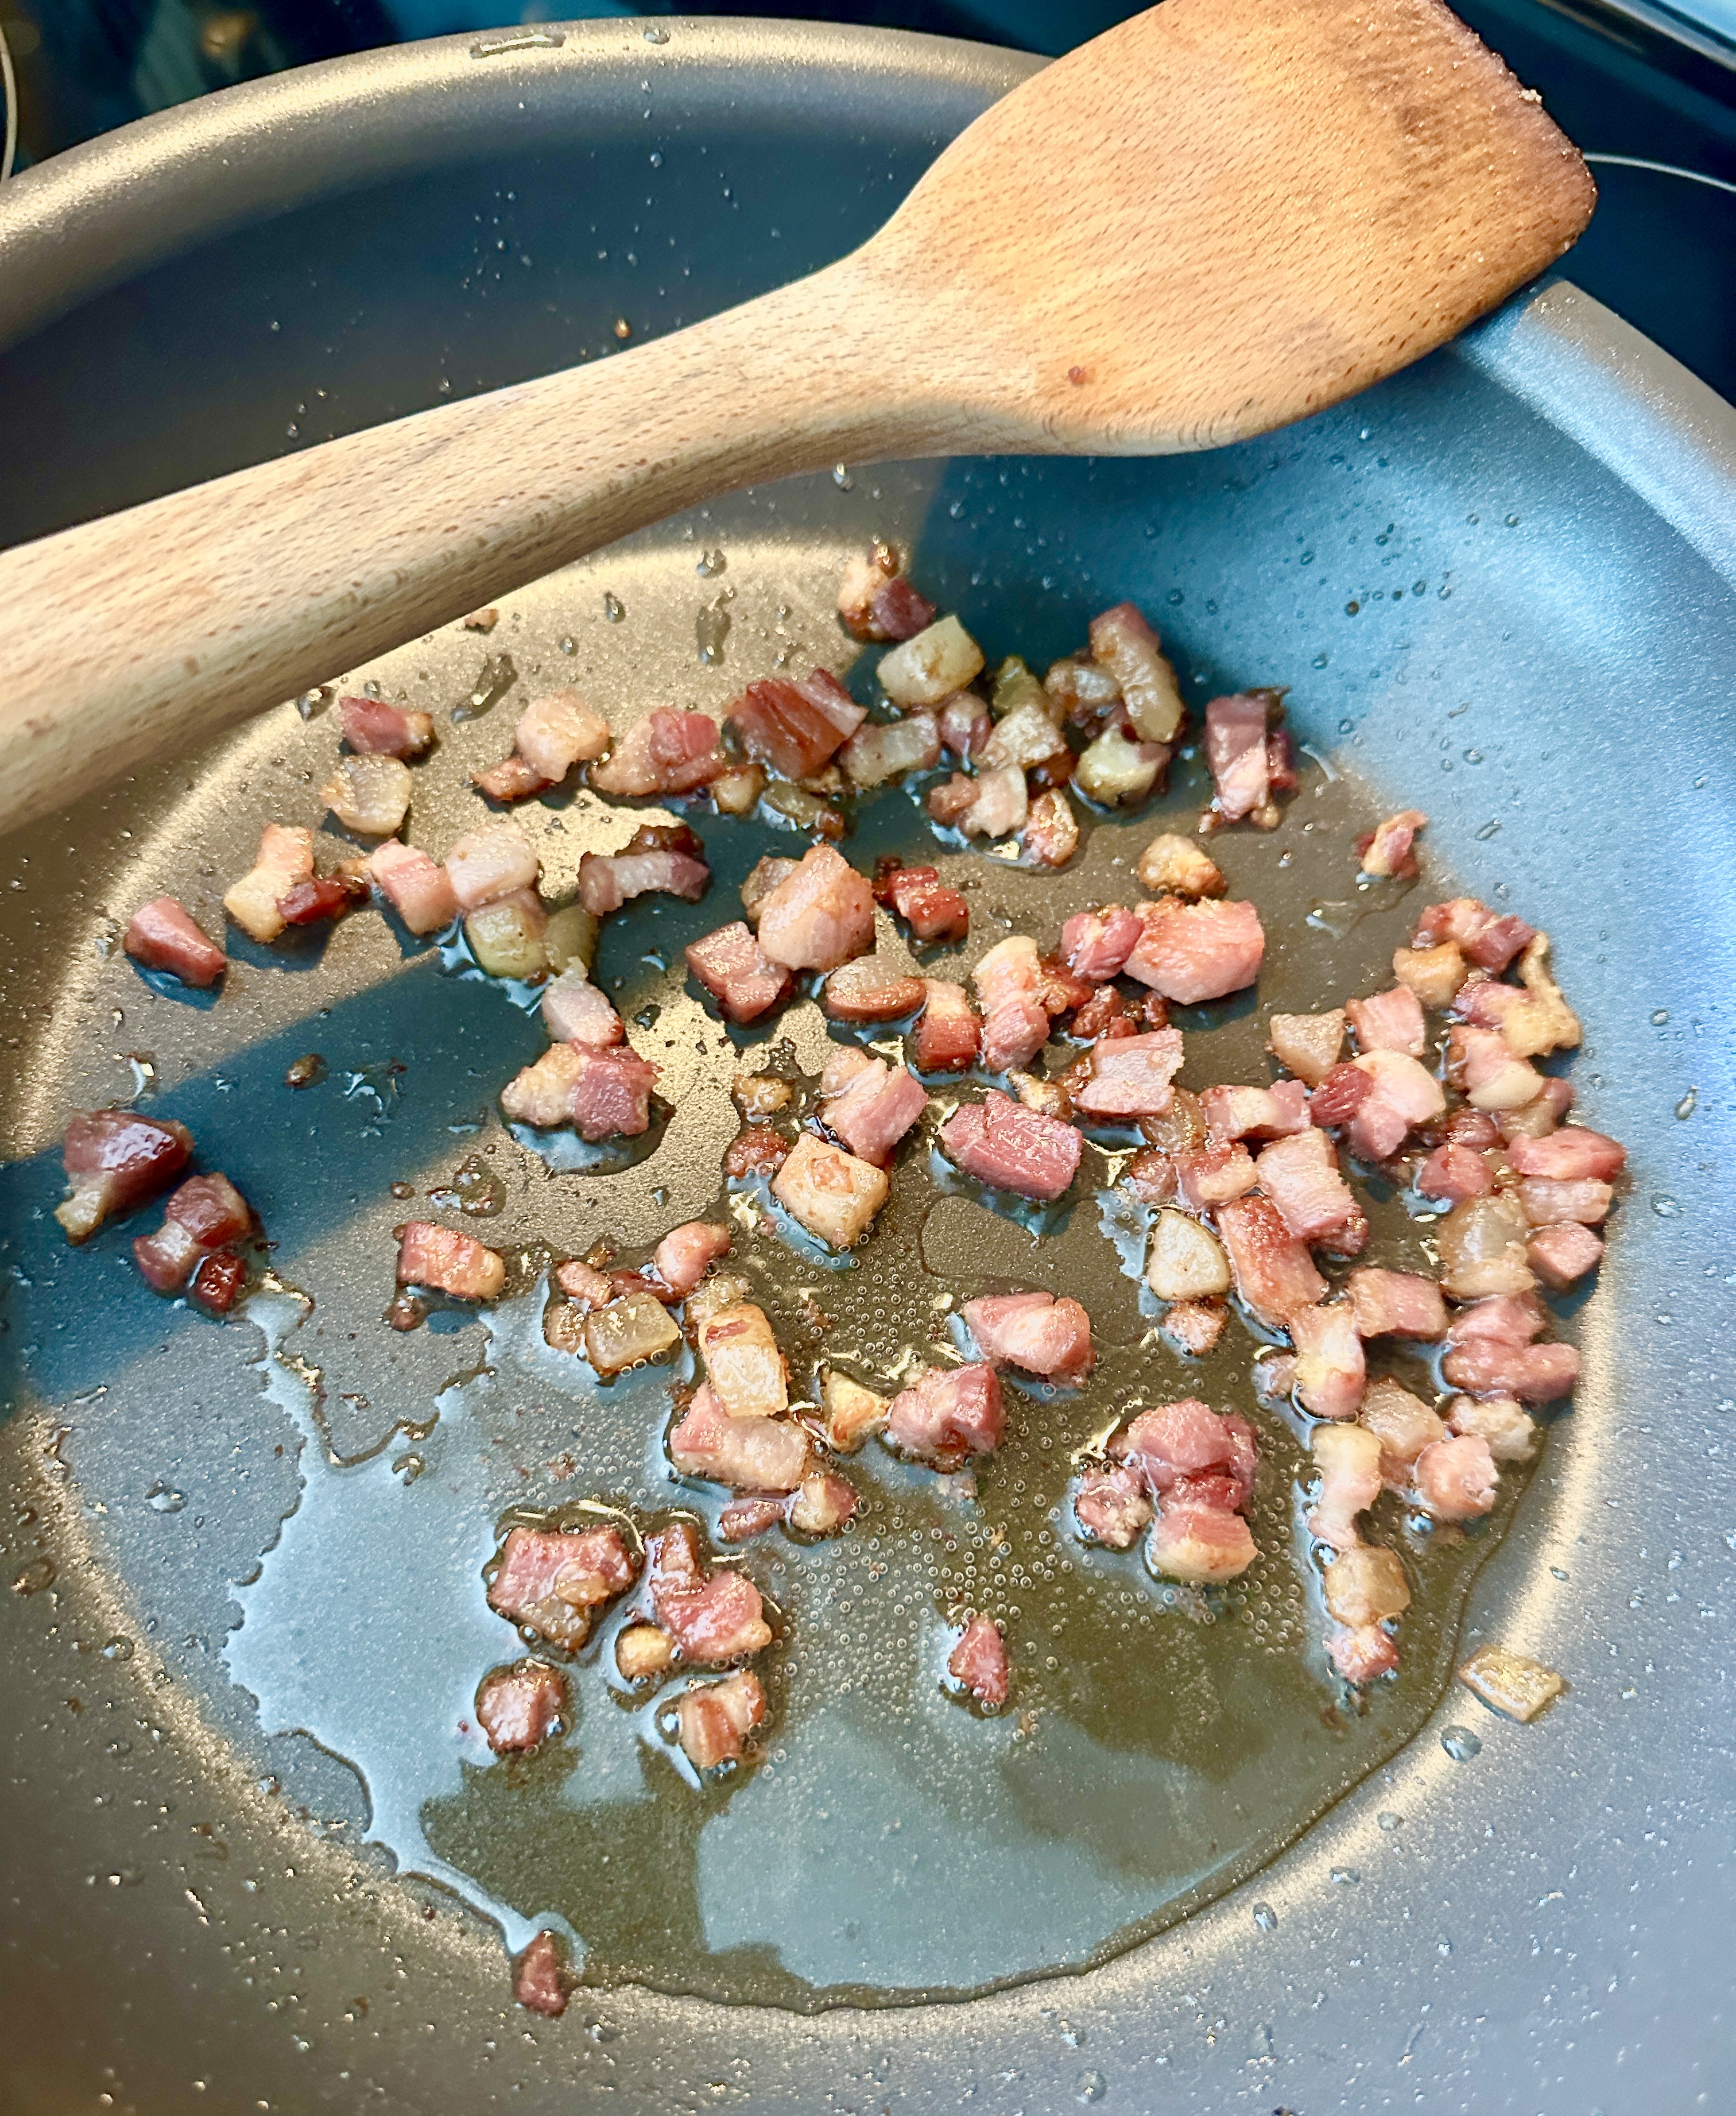
Grill the hot dogs to your liking. Heat the roll to freshen it up and crisp it up. Once the Hot dogs are done, slice them lengthwise down the middle. Heat the sauerkraut in a small pot.
Spread both sides of your roll with the mustard. Put the hot dogs on the roll and top them with the drained sauerkraut. Close the sandwich and enjoy.