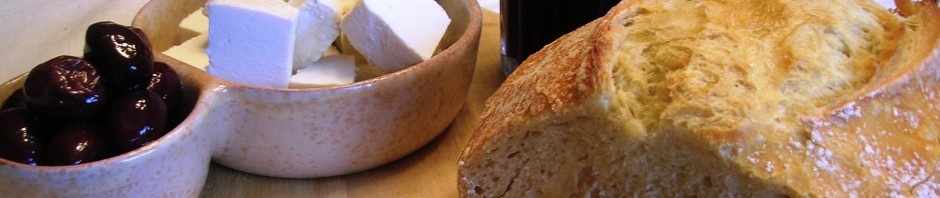
Baked Clams Oreganata

I could never get enough of  baked clams. They are the perfect starter to an Italian meal or part of a hot antipasti platter. Garnished with just a lemon wedge, baked clams are an all time favorite.

Whenever I’m out having dinner at a good Italian restaurant I usually order the baked clams as a starter. When made right these are the original finger food that’s finger licking good. I never bother using the little forks that come with the clams. For the entire baked clams eating experience you have to suck them right out of the shell. Fancy restaurant? No matter. That’s the way these baby’s should be eaten. Even with a little slurp to aerate the flavors going down. Sweet, briny, flavorful.

If I were at a catered affair and the cocktail hour offered baked clams, I was in heaven. All you can fit on that tiny little plate they gave you. The baked clams were always the first to go so you got all you can while you can.

I could remember vacationing on the north shore of Long Island one summer and right in the bay in front of us were a seabed of clams, ripe for the picking. We spent the morning digging for the clams and by late afternoon we were eating baked clams by the dozen. Add some wine or a few beers and the meal was complete.

They are really easy to make, and if you follow my instructions for a non-shucking method of opening up the little gems, you might make these tasty little morsels more often.

Baked Clams Oreganata Cooking Italian Comfort Food

Baked Clams Oreganata

  • 18 little neck clams with reserved clam juice
  • 1/2 cup plain bread crumbs
  • 1 clove garlic, finely chopped
  • 1 tablespoon chopped fresh oregano
  • 1 tablespoon chopped fresh parsley
  • 3 heaping tablespoons of grated Parmigiano Reggiano
  • 3 tablespoons of olive oil plus more to drizzle over clams
  • 1/4 teaspoon black pepper
  • lemon wedges

Unless you have worked at a clam bar, shucking clams is not an easy task. Here is an easy way to get the clams opened and save your fingers from shucking. Pre-heat the oven to 450 degrees. After you washed and scrubbed the clams, place in a single layer on a Focus Foodservice Commercial Bakeware 13 by 18 Inch 18 Gauge Aluminum Half Sheet Pan
Place in the oven for only 2-3 minutes. This will be enough to loosen the clams up so they will be easy to open.

Take the clams out of the oven and with a butter knife or other thin knife without teeth, pry open the clams. I open the clams over a bowl to make sure I catch all the juice that comes out, you will use it in the stuffing. Open up the clam, get rid of the top shell, and loosen the clam in its shell by sliding the knife under the clam.

In a medium bowl mix together the bread crumbs, oregano, parsley, garlic, grated cheese ,  2 tablespoons of reserved strained clam juice, olive oil, and black pepper.

Take the clam and hold it over the bowl with the stuffing. Top the clams with this mixture, but don’t pack down the bread crumbs. Drizzle with some olive oil.

Baked Clams Oreganata 1 Cooking Italain Comfort Food

Place them under the broiler until the clams are done and the bread crumb is crispy and golden, about 4-5 minutes. Serve with the lemon wedges.


(adsbygoogle = window.adsbygoogle || []).push({});

Posted in Antipasto, Seafood | Tagged , , , , , | 33 Comments

Fettucine with Pink Lobster Sauce

Arthur’s Legacy

My grandmother never made anything pink. Certainly not her sauce. This dish has a more northern Italian influence. We rarely ever ate lobster in our house either. Well, until Arthur came into the family. Arthur was from the Coney Island section of Brooklyn. He was dating my sister Annette for quite some time. My mother figured since Arthur came from Coney Island he must be a connoisseur of seafood. I know he liked seafood. And that is all my mother had to know.

My mother cooked meals for Arthur that were fit for a king. And we got to eat those delicious meals as well. That might have been the first time I ever ate lobster in my life. Arthur would come over for dinner every Friday. Back then we never ate meat on Friday so my mother would make a seafood spectacular that made Arthur feel like he never left Lundy’s of Sheepshead Bay.

I would anticipate each meal when Fridays rolled along. Lobster fra Diavolo, Shrimp Scampi, Soft Shell Crab, Fish Oregenato, Baked Clams, Frutti di Mare, a virtual cornucopia of seafood delights. I have to say, those Friday meals with Arthur made me a seafood lover for a life time. And I learned to cook those meals watching my mother.  Anything from the ocean was fine with me. And as far as Arthur was concerned, any family that cooked this well couldn’t be all that bad.

The seafood feasts ended when my sister and Arthur got married.  My sister would not touch a fish. Arthur learned to like turkey roll.


Fettucine with Pink Lobster Sauce

  • 2 (1 1/4 pound each)  live lobsters
  • 2 tablespoons olive oil
  • 2 tablespoons butter
  • 2 garlic cloves, crushed but left whole
  • 1/4 to 1/2 teaspoon dried red pepper flakes to taste
  • 1/2 cup dry white wine
  • 3/4 cup heavy cream
  • 1 – 28 ounce can plumb tomatoes, crushed with masher
  • 1 pound fettucine
  • 1/4 cup grated pecorino Romano Cheese
  • 3 tablespoons of chopped fresh parsley

Fill a large pot with water. Bring the water to a boil. Do not remove the rubber bands from the live lobster. Rinse the lobster quickly.  For those who are concerned about killing a live lobster, this might make you feel better.   Research indicates the lobster has no central nervous system or cerebral cortex to register stimuli, thus the creature mostly likely can feel no pain. If you put the lobster into the boiling water head first slowly this should kill it pretty much instantly and prevent the tail from thrashing. Immediately cover the pot and cook the lobster for 9 minutes over high heat covered. Remove the lobster to cool and reserve the water for cooking the pasta. Add 1 tablespoon of salt to the lobster water.

When the lobster has cooled remove the meat from the shells and chop into coarse pieces. Set aside.

Bring the lobster water back to a boil. Cover and let simmer until you are ready to cook the fettucine.

In a large saute pan, cook the garlic and red pepper in olive oil and butter until the garlic is just turned golden. Remove the garlic from the pan and discard. If you left the pieces large this should be easy to do.

Add the wine to the pan and cook down a minute or two. Add the crushed tomatoes and stir well.  Cook for about 15 minutes on medium high heat. Add the pasta to the boiling water about now and cook till the fettucine is al dente.

Add the heavy cream and cook over low heat about 5 minutes. Add salt to taste.

Remove the pan from the heat and stir in the lobster meat. Drain the pasta and add the cooked pasta to the sauce and heat for about 2 minutes. Take off the heat and sprinkle on the grated Pecorino Romano cheese and chopped parsley.

Enjoy!

Posted in Pasta, Seafood | Tagged , , , , , | 19 Comments

Ziti al Forno – Baked Ziti

Hurricane Ziti

I can’t think of a better comfort food to make during bad weather than a baked ziti. And maybe for the occasion I’ll add little meatballs to it. Hurricane Irene is barreling down on us, we are less than 12  hours away from the eye getting to the New York Metropolitan area. I figure, If I’m going to lose my power I might as well have a good hearty meal on hand to keep me going for a few days. Very easy to heat up on a stove top as well because my double wall oven is electric.

Before Hurricane Irene we would make baked ziti for any special occasion. Especially if we were having a large family party with tons of people. Baked ziti never disappointed. It was a staple of family gatherings. There was always plenty baked ziti and everyone loved it. Add the little meatballs and the occasion became even more special.


Baked Ziti

  • 1 box Barilla Ziti Pasta 16 oz
  • tomato sauce with sausage and little meatballs (recipe follows)
  • 1 pound (16 ounces) ricotta
  • 1 pound shredded mozzarella
  • 1 cup grated pecorino romano cheese
  • 6 basil leaves, torn
  • 3 tablespoons fresh flat leaf parsley, chopped

For the meatballs:

  • 1 pound ground beef
  • 1/2 cup plain bread crumbs
  • 2 large eggs
  • 1 clove garlic, finely minced
  • 1/2 cup grated Locatelli Pecorino Romano – 1 Pound
  • 2 tablespoons chopped fresh Italian Parsley
  • 1 teaspoon salt
  • fresh ground pepper
  • 2 tablespoons olive

Combine all the ingredients except the olive oil in a large bowl and mix well. Shape the meatballs by rolling them between your palms. They should be the size of grapes.

Heat a large frying pan with the olive oil and brown the meatballs on all sides. Let the meatballs sit for a while before turning them, that way they won’t break apart. Don’t worry about cooking them through because they will finish cooking in the sauce. Transfer the cooked meatballs to a plate and set aside.

For the tomato sauce

In a large sauce pot (this is what I use and where you can get it Le Creuset Signature Enameled Cast-Iron 5-1/2-Quart Round French Oven)  heat olive oil on medium high heat. Brown the sausage on all sides. Don’t worry about cooking them through because they will finish cooking in the sauce. Remove the sausage and transfer to a plate.

In the same pot add the chopped onions and cook 2 minutes. Add the garlic and cook 1 minute until fragrant. Add the three cans of peeled tomatoes. In a large measuring cup add 2 cups of water and add the tomato paste. Mix till dissolved then add to the pot of sauce. Bring the sauce to a simmering boil then add the sausage and little meatballs.

Turn the heat to low and cook the sauce for about an hour to an hour and a half, stirring occasionally, partially covered, until thickened. Add the basil and taste for salt and pepper. When the sauce is cooked remove the sausage and little meatballs and set aside. Cut the sausage in little pieces and put with the meatballs.

Just before the sauce is ready bring a large pot of water to a boil and cook the ziti al dente, about 10 minutes. Drain the cooked ziti and place back into the pot. Add about 3 cups of tomato sauce to the ziti and half the grated cheese and mix well. This will prevent the ziti from sticking together. Stir in the meatballs and sausage pieces.

The Assembly:

In a large oven pan or 4 quart casserole baking dish put half of the ziti mixture. Cover it with the ricotta and sprinkle with the mozzarella and some of the other half of the grated cheese. Pour on 1-2 cups of sauce. Top with the remaining ziti and another cup or two of sauce. Sprinkle with the remaining grated cheese. Cover the dish with foil.

Bake the ziti in a 350 degree pre-heated oven for 45 minutes. Uncover and bake for another 15 to 30 minutes, or until the center is hot and the sauce is bubbling around the edges. Cover and let stand for 15 minutes before serving.

Have some extra sauce on the side.

Posted in Pasta | Tagged , , , | 9 Comments

Veal Scaloppine Marsala

“Try the VEAL, it’s the best in the City”.

One of the many memorable quotes from the movie The Godfather
“.

“Leave the gun, take the cannoli”, another one of my favorites.

The year was 1972 and the movie The Godfather was all the rage in the neighborhood. I could remember hearing my friend Robert Di Mauro talking about the movie before I saw it. He was excited and talking about the realism in the opening wedding scene, with the singing of “Cella Luna” and everyone dancing the tarantella. It was like watching a family wedding we were all familiar with.  I could have sworn the old man they led up on the stage to sing Cella Luna was my grandfather! He would sing and dance just like that. What also rang true was hearing the characters speak the Sicilian dialect that I was very familiar with.  We all saw someone we knew in that film. You could “smell the spaghetti”. Luca Brasi reminded me of my uncle’s brother-in-law, Sebastiano.  I guess that is what set apart The Godfather from all the other gangster films before it. We all knew the families, the people, the characters. The Godfather showed the darker side of my Sicilian heritage, which was certainly not the dominant side of what Italians contributed to this country. But I think it was the realism and characters that we related to. In a sense, it was like watching a home movie…for the most part.

The Loew’s Oriental on 86th Street Brooklyn.

I was 18 years old when it first premiered at the Loew’s Oriental on 86th Street and 18th Avenue, Brooklyn.   The line for the Saturday night showing was wrapped around the block. I couldn’t believe it. The only time I remember standing on line to see a movie that wrapped around the block was at Radio City Music Hall in Manhattan. Back then we would see a movie and the Christmas show for a buck and a quarter.  I remember my grandfather would cut in line, and then bring the rest of the family in with him. What nerve! But, that was my grandfather.

At the Loew’s Oriental we went to the back of the line. The people in my neighborhood were not that forgiving. We wanted to see the movie, not get into a war. The Loew’s Oriental was one of the last majestic movie theatres I remember in Brooklyn. This was a time when they only showed one movie at a time in the theatres, not the tenplexes that are around today. Eventually they broke up the Loew’s and made it a multi theatre complex, but in 1972 it was still grand.  I saw Godfather II at the Loew’s theatre as well. It created the same buzz. Godfather III? They should have never made it.

Like the Godfather movies, veal scaloppine Marsala is a real Italian classic.  I’m not sure if this is the dish that Captain McCluskey ate for his last meal before Michael Corleone put a bullet through his head, but it very well could have been.

Marsala wine originates from the town of Marsala, which is a seaport city in the Province of Trapani on the Island of Sicily. This is the source of Marsala wine. Veal scaloppine Marsala is a very simple dish to prepare, but like most good Italian food, it’s not really complicated. Try and get a good quality veal from your butcher and a good quality Marsala wine. You can’t go wrong with that. Enjoy!

Veal Scaloppine Marsala

  • 8 ounces veal cutlets or thin sliced chicken or pork
  • 1/3 cup flour
  • 2 tablespoons butter
  • 2 tablespoons olive oil
  • 8 ounces mushrooms, thinly sliced
  • 1/2 cup Marsala
  • 1/2 to 1 cup beef broth or stock
  • salt and pepper to taste

Place the cutlets between two pieces of plastic wrap and pound with a kitchen mallet till it’s 1/4 inch thin. This will spread out the cutlet as well. Cut it into the portion sizes you prefer. Sprinkle both sides with salt and pepper.

In a large skillet melt t tablespoon of butter and add 1 tablespoon of olive oil. Add the mushrooms and salt and pepper to taste. Cook over medium high heat. Do not touch the mushrooms for at least 5 minutes. Don’t stir, don’t touch. They will brown much better that way.

After 5 minutes give them a stir and leave another 3 minutes, stirring occasionally.  Transfer the mushrooms to a platter.

Add the remaining butter and olive oil.  Spread the flour on a flat place. When the butter is melted dip the scaloppine into the flour, coating both sides. Shake off excess flour and lay the slices in the pan.

Cook the veal until browned on each side, about 1 minute per side. Transfer the slices to the plate with the mushrooms. Repeat with the remaining veal.

When all of the veal is browned remove from pan and add to the plate with the mushrooms.

Add the Marsala to the skillet. Then add 1/2 cup beef broth.  Cook, stirring up all the brown bits on the bottom of the pan, until the wine is reduced, about 1 minuet.

Return the veal and mushrooms to the pan. Cook briefly, turning the veal in the sauce.
This will also thicken the sauce. Cook till sauce is thickened. Taste for salt.

Serve hot.

Posted in Veal | Tagged , , , , , , , , , , , , , | 8 Comments

Southern Fried Chicken (Southern Italy Fried Chicken)

Who doesn’t like fried chicken? Especially done right. I know southerners in the USA claim this as their own. But us southern Italians have just as much a right to fry up some chicken and consider it great “Italian Comfort Food”. So there you are! I know that there is no official Southern Italy Fried Chicken but like most ethnic foods we can take what we want and call it our own.  I have to admit that I use some techniques and ingredients they use south of the Mason Dixon line, but this flavorful version is one you can sink your teeth into  and still have a large side of tomato salad with garlic and olive oil right along with it. And don’t forget the Italian bread.

I think this is some of the most flavorful fried chicken I ever ate. The coating is crisp and flavorful and the chicken is tender and juicy inside. The way fried chicken should be. Hope you enjoy it!

Southern Italy Fried Chicken

For the marinade:

  • 1/2 teaspoon dried sage
  • 1/2 teaspoon dried rosemary
  • 1/2 teaspoon dried oregano
  • 2 teaspoons of salt
  • 1/2 teaspoons of fresh ground black pepper
  • 2 teaspoons of paprika
  • 1/4 – 1/2 teaspoon of cayenne pepper, according to taste
  • 1 teaspoon onion powder
  • 1 teaspoon garlic powder
  • 1 teaspoon sugar
  • 2 cups buttermilk

For the coating:

  • 2 cups all-purpose flower
  • 2 teaspoon salt
  • 1/2 teaspoon black pepper
  • 2 teaspoons paprika
  • 1/2 teaspoon garlic powder
  • 1/2 teaspoon onion powder
  • 1 Fryer chicken, cut up
  • Vegetable oil or shortening for frying

Wash and dry your chicken pieces. Combine all the ingredients for the marinade in a large bowl and mix well. Add the chicken pieces and cover and place in refrigerator for a minimum of 4 hours up to 8 hours.

In a large zip lock bag place the ingredients for the coating and mix well. Drain the chicken of the marinade in a colander.

Place the chicken in the zip lock bag with the coating, seal the bag and shake it well to coat all the pieces. Remove the pieces from the bag and let sit on a plate till the coating becomes “doughy” and wet, about 10-15 minuets.

In the meantime fill a cast iron pan or deep fryer with peanut oil or shortening for frying, about halfway up. On medium high heat allow the oil to reach 350 degrees.

Place the chicken in the pan and cook about 5 minutes on each side to crisp. Turn the heat down to medium low, cover the pan and cook another 10 minuets on each side. Remove the cover and turn the heat high again to crisp each side of the chicken till they are golden brown.

Cook the chicken in batches if you need to. Don’t over crowd the frying pan. Place the cooked chicken on paper towel lined plates to absorb the oil.

Posted in Chicken | Tagged , , , , , , , | 7 Comments

Cucuzza

You rarely find this vegetable in the supermarkets, if at all.  But if you lived in Brooklyn or any Italian neighborhood you could find cucuzza growing in just about everyone’s garden. It was as much a part of summer as  the tomato.

Cucuzza is Italian Squash. I used to love hearing my grandmother saying “cucuzza”, or as the next generation called it, “gagootz”. There is something earthy about it.  Even Louis Prima sang about Cucuzza. The seeds would be brought over from Italy and once they were planted would produce these huge, light green colored,  sometimes 3-4 feet long, most of the time curled squash that hung from tall vines. Neighbors would share their seeds with neighbors if anyone forgot to save them from the previous year’s crop. Once you got your hands on a cucuzza, and it was mature enough, you could save some seeds and have a planting for next season.

You prepare cucuzza as you would zucchini or any other squash. So if you don’t have a source of cucuzza don’t fret, zucchini will work just as well. You can make a vegetable stew out of it, add it to macaroni, fry it, stuff it, steam it. It goes as well with pasta as it does with meat.

My mother and grandmother usually made cucuzza with macaroni. It was basically a fresh tomato sauce with garlic and onion and fresh basil with the cucuzza cooked in the sauce and then served over the pasta. (see my post of “Pasta con Zucchini”) Another way they made it was in a vegetable stew with potatoes, carrots and onions. This way is best eaten as a side dish with some meat or fish. If you leave out the potatoes you can add this version to macaroni as well.

Cucuzza

  • 3-4 pounds cucuzza (or zucchini), peeled and cubed
  • 1  1/2 cups carrots, sliced into 1/4″ rounds
  • 2 medium onions. 1/4 inch sliced
  • 2 medium potatoes, peeled and cubed
  • 1- 28 ounce can of San Marzano peeled tomatoes, puree
  • 1/4 cup olive oil
  • 3 cloves garlic, chopped
  • 6-7 fresh basil leaves, torn
  • 1 bay leaf
  • 1 teaspoon red wine vinegar
  • salt and black pepper to taste
  • 1/4 cup grated Parmesan cheese

Cut the cucuzza into quarters. Using a sharp paring knife, cut the skin off the cucuzza.

Cut each piece into quarters again, and if the seeds are overgrown and developed cut them out. Cut into 1/2″ cubes.

Peel and cut the potatoes into the same size you cut the cucuzza. Peel and slice the carrots into 1/4″ rounds. Cut the onions into 1/2″ slices.

In a large saute pan heat the olive oil over medium heat. Add the garlic and cook 30 seconds. Turn the heat up to medium high and add the carrots and onions and saute till onions are soft, about 5 minutes.

Add the puree peeled tomatoes, rinse the tomato can with 1/2 cup water and add to the pot and stir to mix. Add the cucuzza and potatoes, bay leaf and vinegar. Season with salt and pepper.  Stir well. Bring to simmer and then reduce heat to medium and cover and cook down about 20 minutes, stirring occasionally.

Uncover the pan and continue cooking over medium heat until sauce thickens, about another 25 minutes, stirring occasionally to keep from burning.

Take off of heat and stir in 1/4 cup grated Parmesan cheese and the torn basil leaves. Stir well.

Posted in vegetable | Tagged , , , , , , , , , | 46 Comments

Mom’s Chick Pea Salad

OK…here’s my rant!

Whatever happened to the friendly local merchant? I’m not talking about the large national retail stores like Macy’s or Target where the sales associate couldn’t give a rat’s behind whether or not you bought from them or not. I’m talking about the neighborhood Krauzer’s or Seven Eleven or local Deli that you visit on a daily basis for the last 10 years and the owner bareley looks up when you hand him a 20 dollar bill, let alone says thank you for your business. I asked my son Joseph about this and he tells me I’m making too much of it. That’s the problem. People don’t connect anymore. I’m not saying all local merchants are like that. Thank goodness there are still some out there that take their work personal and give you that personal service and greeting. But for the most part some of these local merchants make you feel like they are doing you a favor by being there and having to sell you their merchandise. There is no connection. You might as well be taking their goods from a vending machine. And these aren’t high school teens that are getting minimum wages I’m talking about. These are the owners of the establishments.

I stopped going to the Krauzer’s down the block from me after I had to hear for the tenth time the owner carry on a conversation with his wife in another language without even making eye contact with me while he took my money and gave me change. Enough is enough. Don’t do me any favors.

I could remember growing up in Brooklyn and going to the neighborhood deli and bakery and local candy store and people actually addressed you by your first name. They knew your mother and father and grandparents as well and always asked how they were doing. Or if they didn’t see your grandfather come into the store for a while they would ask with concern how he was doing.

Just by the fact that my son doesn’t have any concern about this tells me that we have lost something, and I’m not sure why. We lost the care and concern that people have for each other and the interaction that comes with a familiar face or acquaintance. We live in a world of I pods and texting and cell phones  and the person who walks past you with a cell phone in their ear bumps you and doesn’t even look up to say excuse me. This is progress?

I guess I’m old fashioned. I guess I have experienced the “old way” of growing up in a neighborhood that was really like a village, where your neighbors actually cared about you. A neighborhood that when you ventured out in the street at an early age when you were not supposed to, your mother didn’t have to catch you doing that. It was a neighbor who saw what you did and told your mother about your misbehavior. And your mother didn’t take offense that someone scolded you for misbehaving. She was grateful for that person keeping an eye on you.  And when i got home and was punished for my wrong  doing I never did it again. I lived in a neighborhood that you addressed every adult that you saw as Mr. and Mrs. or Signora because that showed respect, the same respect we held for our parents and family. The people on our block was an extended family, and we never realized it at the time. There was always eyes looking out the windows, people sitting on their outside porches and kept an eye on things. You can call it the original neighborhood watch.

I guess we have the freedom to shop where ever we want, but it’s getting harder and harder to find the type of stores we had growing up in Brooklyn. Wonder if they are still in Brooklyn?

Mom’s Chick Pea Salad

  • 2 cups cooked chick peas, if canned, drained and rinsed
  • 1 cucumber, diced, seeds removed
  • 1/4 cup red onion, diced
  • 1/4 cup pitted oil cured olives, roughly chopped
  • 2 tablespoons mint leaves, chopped
  • 1/4 cup extra virgin olive oil
  • 2 tablespoons red wine vinegar
  • salt and pepper to taste

Peel and cut the cucumber in half. Cut a V in the center to remove the seeds. Cut each half length wise into four pieces and cut into a 1/4 inch dice. Do the same with the other half.

To pit the oil cured olives smash each olive with the side of your knife like you would smash a clove of garlic to remove the skin. The pit can be easily removed now.

In a large bowl add the chick peas, cucumber, red onion, oil cured olives, and mint. Toss gentley. Add the olive oil, red wine vinegar and salt and pepper. Chill the salad at least an hour before serving. When ready to serve, mix well and serve with plenty of  Italian bread.

Posted in Antipasto, Salad | Tagged , | 4 Comments

Linguine with Clams

This has to be one of my all time favorite pasta dishes. There is nothing quite like Linguine made with a fresh clam sauce. Back in the 70’s there was a place in Little Italy in New York City called Umberto’s Clam House. They opened up a location right in my neighborhood in Brooklyn on 86th Street. They made some of the best Linguine with clams I have ever had. Each dish was made to order, using fresh whole clams and even cooking the pasta to order. I rarely order pasta when I go out to eat. I have all I want at home. But when I visited Umberto’s, Linguine with Clams was a destination dish.

The secret to this dish is using only fresh ingredients, pure and simple. Get your hands on the freshest Little Neck clams available. Use a good quality olive oil and pasta. And use only fresh parsley. A touch of white wine, garlic and a hint of oregano bring this dish together. It’s heaven on a plate.

Linguine with Clams

  • 1 pound linguine
  • 45-50 Little Neck clams, washed and scrubbed well*
  • 4 cloves garlic, crushed
  • 2 tablespoons dry white wine
  • pinch of dried oregano
  • 1/4 cup chopped fresh Italian parsley
  • 1/2 cup extra virgin olive oil
  • kosher salt
  • ground black pepper
  • red pepper flakes (optional)

*The clams see to it themselves that there is no dirt or grit inside their home. Any grit you may get comes from the outside of the clam, so be sure you scrub the clams well under running water with a good stiff brush. 45-50 clams will produce enough liquid for a pound of pasta. I promise, it will not be dry.

Bring a large pot of salted water to a boil. Add the Linguine and cook till tender.

In the meantime, in a large, deep pan, cook the garlic in the olive oil over medium heat for about 1 minute or until the garlic just turns golden.

 Add the whole clams, white wine, and oregano.

Cover the pan and simmer over low heat, shaking the pan occasionally  to ensure the clams cook evenly. Once all the clams open and release their juices, immediately remove from heat and salt to taste.

When the spaghetti is al dente, strain and place in a large bowl or platter, then pour the clams and juices over the pasta, add the chopped parsley, and if desired, ground black pepper and red pepper flakes.

 Toss gently and serve immediately with grated Parmesan cheese. Have a large empty bowl on the side for the clam shells.

Posted in Pasta, Seafood | Tagged | 3 Comments

Tonno a la Stemperata – Tuna in Vinegar

This dish is well-known in my father’s town of Ragusa. It is served cold or at room temperature. The tuna can be broken in pieces and served with the accompanying olives, capers and celery. In the tradition of a caponata, Tonno a la Stemperata is traditional Sicilian dish bursting with flavors of vinegar, olives, mint, capers and garlic. I actually enjoy eating this dish in all its stages, hot, room temperature and cold. It takes on a different character at each level. But I like it best the next day with a loaf of Italian bread and a glass of beer. It’s a perfect summer time meal, prepared the previous day and eaten cold with a salad at your leisure. Don’t be afraid of the raisins, like many ingredients, they take on a totally different flavor when prepared this way and lend just a touch of sweetness to the vinegar and briny taste of the olives. A sweet, sour, savory experience with a background of mint. An outstanding flavor experience! Hope you enjoy it.

Tonno a la stemperata  –  Tuna fish in vinegar

  • 2 1/2 pounds tuna, sliced into steaks
  • 8 ounces of pitted green olives
  • 2 ounces of capers, drained and rinsed
  • 1.5 ounces of raisins
  • 2 stalks celery, chopped
  • 4 cloves of garlic, minced
  • 3 tablespoons chopped fresh mint
  • 1/2 cup red wine vinegar
  • 3 tablespoons of olive oil
  • salt and pepper to taste

Brown the tuna fish in the olive in a frying pan over medium high heat, about 4 minutes each side. Remove the fish and place on a plate.

In the olive oil left in the pan, cook the celery till tender.

 Add the garlic and cook till the garlic just turns golden. Do not burn.  Add the olives, capers, mint and raisins. Cook for about 3 minutes.

Put the fish back in the pan and add the vinegar. Season with salt and pepper and cook for 3  or 4 minutes more, until tuna is cooked till desired doneness.

Plate the fish with all the condiments. This dish is best  serve cold.

Posted in Seafood | Tagged , | Leave a comment

Smoked Barbecue Pork Ribs

I know I’m straying again. But I happen to love good barbecue. My sons got me a Char-Broil Offset Smoker American Gourmet Deluxe Charcoal Grill for father’s day a number of years ago and I’ve been smoking ribs, salmon, brisket and chicken ever since.

The first summer I had the smoker my boys, who were both living with me at the time, couldn’t stand another barbecue rib. I was smoking every weekend, experimenting with different rubs, woods and smoking times and techniques. They were my lab rats. By the end of the summer, when they smelled the pungent aroma of hickory smoke, they both took off and disappeared for the day.

I’ll never forget the time I put out smoked barbecue ribs for my family one weekend during a party. In addition to the ribs I had baked ziti, sausage and peppers, chicken with lemon and garlic, so the barbecue ribs were a change of pace for my family. Thought I’d give them something they never had before.

I might as well have put out sushi for them.

Those of you who know good barbecue realize that the red ring on the meat is an indication that it was smoked properly. Pork tends to turn red when it’s smoked for a long time. It’s thoroughly cooked, but the chemical reaction from the smoke turns the meat red. I should have realized that giving my Italian family anything that resembles a little pink in their pork is like asking them to swallow a cyanide capsule.

It didn’t dawn on me, even after seeing everyone’s rib on their plate with only one bite in it. Of course everyone was too polite to actually tell  me that they thought my spare ribs were raw. My sister-in-law Lillian was sitting next to my mother and leaned over and whispered in her ear, “don’t eat the spare ribs, they’re raw”.

I”m going to be kind here….but…they really should get out more and try new things.

After years of experimenting I came up with this recipe for barbecue pork ribs. The only special equipment you will need is a smoker. Smokers come in all sizes, depending on your needs. My smoker looks like a 50 gallon barrel on its side with a chimney on top. On its side is a smaller chamber which is the fire-box. That way the meat you are smoking gets indirect heat and plenty of smoke. I smoke my ribs for about 4 hours. I use the smoke like an ingredient. For me, 4 hours of smoke is enough. I then finish my ribs wrapped in foil in a 200 degree oven for another 2 hours till they are fall off the bone tender.

 Smoked Barbecue Pork Ribs

Dry Rub

  • 2 tablespoons paprika
  • 2 tablespoons kosher salt
  • 3 tablespoons sugar
  • 3 tablespoons brown sugar
  • 1 tablespoon ground cumin
  • 2 teaspoons chili powder
  • 1 tablespoon black pepper
  • 1/2 teaspoon cayenne pepper
  • 1 tablespoon onion powder
  • 1 tablespoon garlic powder
  • 1 tablespoon celery salt
  • 1 tablespoon dry mustard
  • 1/2 teaspoon nutmeg
  • 1 teaspoon oregano

Combine all the above ingredients in a medium bowl. For a smoother rub you can puree the ingredients in a spice grinder or coffee grinder until well combined and all the spices are uniform. The rub will be very fine and tan in color. This is an optional step.

This rub can be stored in an airtight container for up to 6 months if you have any left over.

  • 2 racks of pork ribs
  • 1 lemon
  • 1/2 cup barbecue rub

The night before you plan on smoking your ribs, remove the silver skin from the back of the ribs.

Cut the lemon in half and rub the half over one rack of ribs on both sides, squeezing the juice of the lemon over the ribs. Do the same with the other lemon half on the second rack of ribs.

Rub the ribs on both sides liberally with the spice rub. Place about 2 tablespoons of the spice rub on each side of the ribs and rub it in good.

Cut each rack in half and place the two halves in a large zip lock bag. Allow to marinate in the refrigerator overnight.

When you’re ready to smoke the ribs build a charcoal fire in your fire-box or on one side of your barbecue grill.

When the coals are white-hot take the ribs out of the zip lock bags and place them bone side down on your cooking grate at the opposite end from where your fire is. You want to cook them with indirect heat.

Place a good couple of hand fulls of your water-soaked wood chips on top of the white-hot coals and close the lid on the grill. In addition to hickory wood chips I use branches I saved from my fruit tree pruning. I use apple wood, pear wood, peach and plum wood as well. Whatever I have at the time.

Do not open the grill to check the ribs. Add more wood chips as needed to keep the smoke up. The temperature inside the grill should hold at 200 degrees. Adjust the damper and chimney flue to keep the fire at that temperature  Allow the ribs to smoke for at least 3 hours, up to 4 hours.

After the smoking time, lift the cover of your smoker and take out the ribs.

Place in a large piece of heavy-duty or double lined regular foil and seal it tightly. Place the foil packets in a 200 degree oven for at least another 2 hours.

You will know your ribs are done when the meat pulls away from the end of the rack exposing about 1/2 to 1 inch of the bone. You can serve the ribs just as is, the dry rub adds tons of flavor. Or you can mop up the ribs with your favorite barbecue sauce and grill them till the sauce carmelizes.

When you finish your ribs in the foil you can cool them down from that point , unopened, and place them in the refrigerator to use within the next couple of days. When you’re ready to eat the ribs just take them out of the foil and grill as they are or with your favorite barbecue sauce.

Posted in Pork | Tagged , , , , , , | 6 Comments